Build and Refine Codebases with AI
Multi-step prompt workflow that builds a coding agent using GPT-5.1 and OpenAI Agents SDK to scaffold apps, apply patches, execute shell commands, and pull
Why it matters
Develop a sophisticated coding agent capable of scaffolding new applications from prompts, iterating on code through user feedback, and leveraging external documentation for informed development.
Outcomes
What it gets done
Scaffold new projects using web-sourced context and shell commands.
Iterate on existing codebases with in-place edits via the apply_patch tool.
Integrate with external documentation sources for up-to-date context.
Execute shell commands for tasks like scaffolding and dependency management.
Install
Add it to your toolbox
Run in your project directory:
curl -fsSL https://spark.entire.vc/get/oai-buildacodingagentwithgpt-51 | bash Steps
Steps in the chain
Define an agent using the Agents SDK by providing instructions and a list of tools. Use the gpt-5.1 model for state-of-the-art coding abilities. Enable web_search to look up up-to-date information online, and shell to let the agent propose shell commands for tasks like scaffolding, installing dependencies, and running build steps.
Create a ShellExecutor class that receives a ShellCommandRequest from the agent, optionally asks for approval before running commands, runs them using asyncio.create_subprocess_shell, and returns a ShellResult with the outputs. Run all commands with cwd=workspace_dir to isolate them in a dedicated workspace directory.
Configure the agent with the necessary tools and instructions for coding tasks.
Send a prompt to the coding agent to scaffold a new project. For example, create a NextJS dashboard using the shadcn library. If you encounter MaxTurnsExceeded error or dependency issues, run the agent loop again. Once complete, verify the output by navigating to the project directory and running npm run dev.
Configure the apply_patch tool to enable the agent to edit files directly. In production, run these edits in a sandboxed project workspace such as ephemeral containers, and work with IDEs.
Integrate the Context7 MCP server to provide the agent with access to up-to-date documentation for making informed code decisions.
Create a new agent configuration that includes the apply_patch and Context7 MCP tools. Update the agent instructions accordingly. Specify not to edit files via command to avoid context mismatch when applying diffs.
Execute the updated agent to iterate on and refine the project. The agent will apply patches and integrate OpenAI Responses API calls. If the step fails, re-run the agent loop. In production, implement an outer loop to handle errors or wait for user input.
Overview
Building a Coding Agent with GPT-5.1 and the OpenAI Agents SDK
What it does
A cookbook guide for building a coding agent equipped with shell execution, file patching, web search, and documentation access capabilities using the Agents SDK.
How it connects
Use this when you want to create an agent that can scaffold projects, execute commands in a workspace, and iterate on code using the apply_patch tool with GPT-5.1.
Source README
Building a Coding Agent with GPT-5.1 and the OpenAI Agents SDK
GPT-5.1 is exceptionally strong at coding, and with the new code-editing and command-execution tools available in the Responses API, it’s now easier than ever to build coding agents that can work across full codebases and iterate quickly.
In this guide, we’ll use the Agents SDK to build a coding agent that can scaffold a brand-new app from a prompt and refine it through user feedback. Our agent will be equipped with the following tools:
- apply_patch - to edit files
- shell - to run shell commands
- web_search - to pull fresh information from the web
- Context7 MCP - to access up-to-date documentation
We’ll begin by focusing on the shell and web_search tools to generate a new project with web-sourced context. Then we’ll add apply_patch so the agent can iterate on the codebase, and we’ll connect it to the Context7 MCP server so it can write code informed by the most recent docs.
Set up the agent
With the Agents SDK, defining an agent is as simple as providing instructions and a list of tools. In this example, we want to use the newest gpt-5.1 model for its state-of-the-art coding abilities.
We’ll start by enabling web_search, which gives the agent the ability to look up up-to-date information online, and shell, which lets the agent propose shell commands for tasks like scaffolding, installing dependencies, and running build steps.
The shell tool works by letting the model propose commands it believes should be executed. Your environment is responsible for actually running those commands and returning the output.
The Agents SDK automates most of this command-execution handshake for you-you only need to implement the shell executor, the environment in which those commands will run.
Define a working environment and shell executor
For simplicity, we'll run shell commands locally and isolate them in a dedicated workspace directory. This ensures the agent only interacts with files inside that folder.
Note: In production, always execute shell commands in a sandboxed environment. Arbitrary command execution is inherently risky and must be tightly controlled.
We’ll now define a small ShellExecutor class that:
- Receives a
ShellCommandRequestfrom the agent - Optionally asks for approval before running commands
- Runs them using
asyncio.create_subprocess_shell - Returns a
ShellResultwith the outputs
All commands will run with cwd=workspace_dir, so they only affect files in that subfolder.
Define the agent
Start a new project
Let’s send a prompt to our coding agent and then inspect the files it created in the workspace_dir.
In this example, we'll create a NextJS dashboard using the shadcn library.
Note: sometimes you might run into an MaxTurnsExceeded error, or the project might have a dependency error. Simply run the agent loop again. In a production environment, you would implement an external loop or user input handling to iterate if the project creation fails.
Once the agent is done creating the initial project (you should see a "=== Run complete ===" log followed by the final answer), you can check the output with the following commands:
cd coding-agent-workspace/<name_of_the_project>
npm run dev
You should see something like this: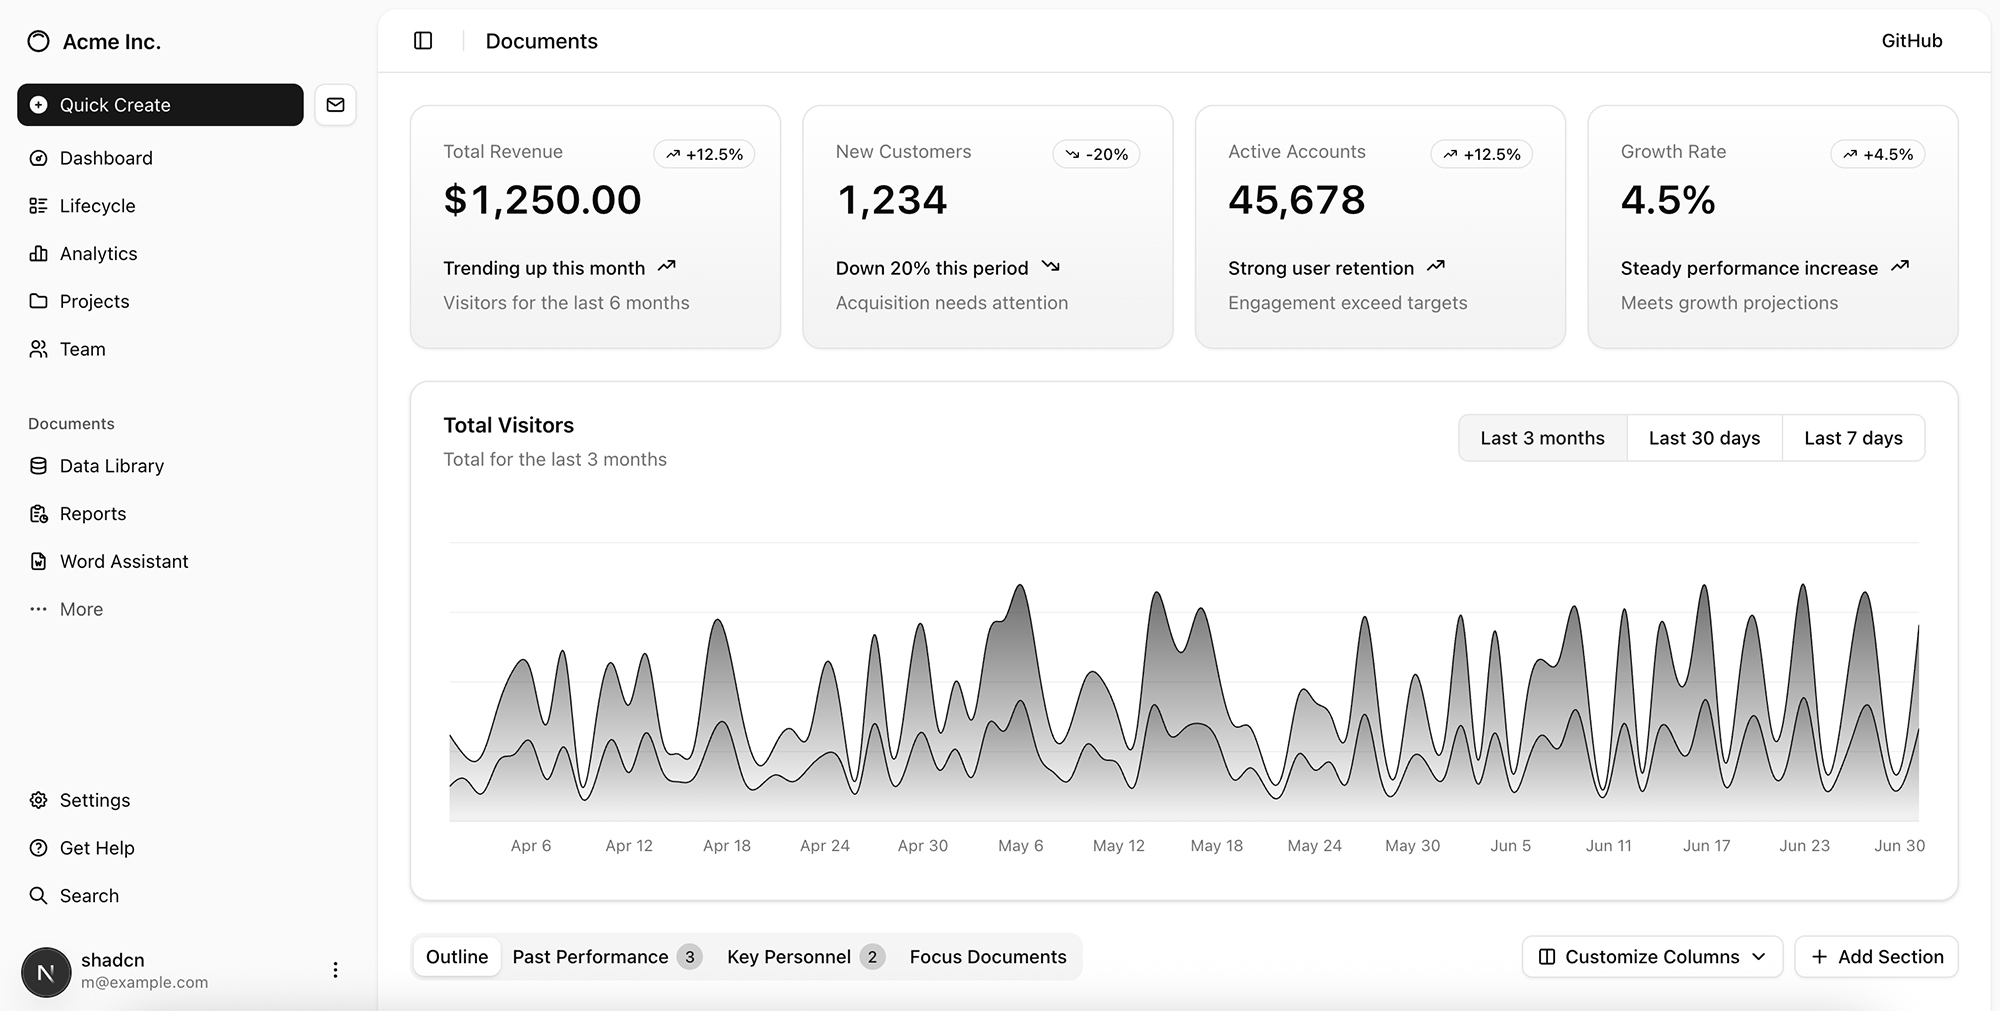
Iterate on the project
Now that we have an initial version of the app, we can start iterating using the apply_patch tool. We also want to include calls to the OpenAI Responses API, and for that, the model should have access to the most up-to-date documentation. To make this possible, we’ll connect the agent to the Context7 MCP server, which provides up-to-date docs.
Set up the apply_patch tool for in-place edits
Note: in production you’ll typically want to run these edits in a sandboxed project workspace (e.g. ephemeral containers), and work with IDEs.
Connect to the the Context7 MCP server
Update the agent
Let's create a new agent that also uses these two additional tools, and update the instructions accordingly.
To avoid a context mismatch when applying the diffs, for this agent we'll specify not to edit files via a command.
Run the agent to edit the project
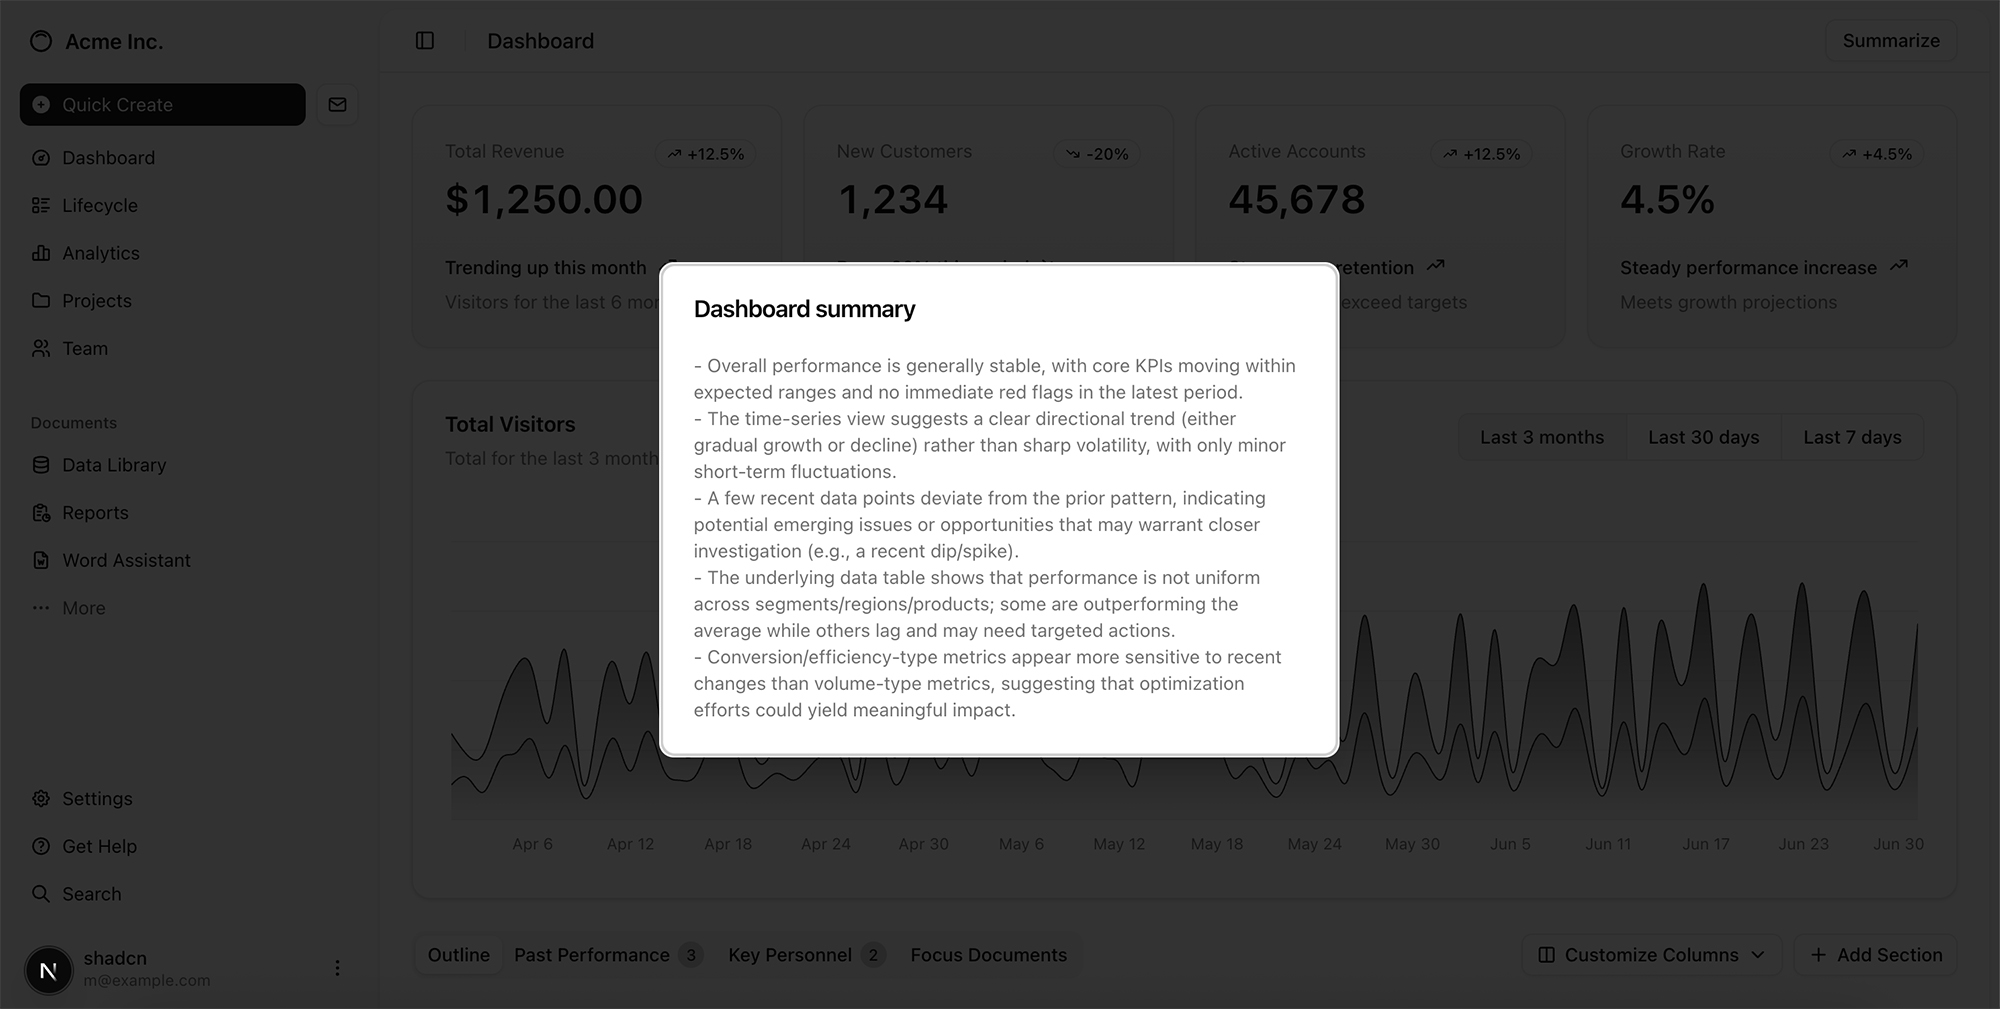
Once the agent is done updating the project (you should see a "=== Run complete ===" log followed by the final answer), you will see the updated UI, with the OpenAI Responses API call to summarize what's on the dashboard.
Note: If this step fails, you can re-run the agent loop. In a production environment, you would implement an outer loop that handles errors or wait for user input and iterate.
Wrapping up
In this cookbook guide, we built a coding agent that can scaffold a project, refine it through patches, execute commands, and stay up to date with external documentation. By combining GPT 5.1 with the Agents SDK and tools like shell, apply_patch, web_search, and the Context7 MCP, you can create agents that don’t just generate code-they actively work with codebases: running commands, applying edits, pulling in fresh context, and evolving a project end-to-end.
This workflow is a powerful blueprint for building agents that feel less like tools and more like collaborators. You can extend this pattern to integrate agents into IDEs or code sandboxes, generate new apps from scratch, work across large codebases, or even collaborate with developers in real time.
Step 1: Set up the agent
Define an agent using the Agents SDK by providing instructions and a list of tools. Use the gpt-5.1 model for state-of-the-art coding abilities. Enable web_search to look up up-to-date information online, and shell to let the agent propose shell commands for tasks like scaffolding, installing dependencies, and running build steps.
Step 2: Define a working environment and shell executor
Create a ShellExecutor class that receives a ShellCommandRequest from the agent, optionally asks for approval before running commands, runs them using asyncio.create_subprocess_shell, and returns a ShellResult with the outputs. Run all commands with cwd=workspace_dir to isolate them in a dedicated workspace directory.
Step 3: Define the agent
Configure the agent with the necessary tools and instructions for coding tasks.
Step 4: Start a new project
Send a prompt to the coding agent to scaffold a new project. For example, create a NextJS dashboard using the shadcn library. If you encounter MaxTurnsExceeded error or dependency issues, run the agent loop again. Once complete, verify the output by navigating to the project directory and running npm run dev.
Step 5: Set up the apply_patch tool for in-place edits
Configure the apply_patch tool to enable the agent to edit files directly. In production, run these edits in a sandboxed project workspace such as ephemeral containers, and work with IDEs.
Step 6: Connect to the Context7 MCP server
Integrate the Context7 MCP server to provide the agent with access to up-to-date documentation for making informed code decisions.
Step 7: Update the agent
Create a new agent configuration that includes the apply_patch and Context7 MCP tools. Update the agent instructions accordingly. Specify not to edit files via command to avoid context mismatch when applying diffs.
Step 8: Run the agent to edit the project
Execute the updated agent to iterate on and refine the project. The agent will apply patches and integrate OpenAI Responses API calls. If the step fails, re-run the agent loop. In production, implement an outer loop to handle errors or wait for user input.
Discussion
Questions & comments · 0
Sign In Sign in to leave a comment.